Delice allows you to keep your image references in centralized location. Once you added the image to the app you should not worry about the subdirectory where it is kept. All you need to to do is to assign tags to that image and use the search feature to generate mood boards or engage in a daily drills.
Decide where images will be kept
One of the most crucial aspect of the app is to configure the root directory for you images on the first start. This is a one time decision. Under the hood, Delice uses the directory in your file system to keep all images in one place. All information about images, tags and other metadata stored in the database. Delice will not alter the images, it will just store them in designated location. Should you need the original image you can search it by date when it was added. However, the simpler way will be just use “Copy to clipboard” feature within the app.
Given that the data stored in the directory as regular files you can setup any backup system on top of this directory and all your references will be safe. This can include automatic synchronization via Dropbox, Google Drive, Microsoft One Drive or any other way. In order to recover your data all you need is restore the directory and make sure the Delice is configured for that.
Main Window

The main window is the place where you navigate through your image refences. There are 4 main elements that you should know about. The area marked by number one contains all the widgets related to search (and collections). The area marked by number two is for displaying Tag List. The area marked by number three is for previewing all the images returned by search. You can also navigate by Home and End button to jump on the image list. The list will contain up to 1000 images. The area marked by number 4 is a notification area. For now it only displays information about progress on automating image tagging.
Collections
Even though the Delice can generate boards by given tags, sometimes you need more fine grained control of what is generated in the board. To achieve that you can collect images in a collection that is aimed for your current project.
By clicking the Collections button you can add or remove collection. By pressing “right” arrow next to a collection will display all the related images in the preview. You then can click Board or Practice and work with these images.
By right clicking on a thumbnail and selecting Assign Collection menu you can assign image to a collection.
Search
The search bar is used to search images by tags. The search is relatively simple. Just list all the tags you are interested in by coma and all relevant images will be displayed.
If you leave the search bar empty then by clicking Search button all the images that have no tags will be displayed.
By setting asterisk ‘*’ as a search criteria, all images will be displayed.
The right most button (with three lines on it) can be used to control whether the search output will be randomly shuffled or not. It can be helpful when you want to “stable upon” and image related to the search criteria.
To search by tag just enter the tag name. Keep in mind that tag name should match exactly as you specified it when tagging the image in order to get the results. You also can list the tags by comma, then all the images that have either of the tag will be displayed in the search result.
There are multiple buttons on the search bar. The “backspace” button will clear the search box and activate search images that do not contain the tags.
Three other buttons are tied to search bar, meaning whatever is entered into search bar will control the windows activated by each button. The button Search will activate the search. The button Board will trigger Mood Board generation. The Practice button will activate the Deliberate Practice mode.
Available Tags
The Left side of the main window marked by number two displays the list of all tags that have been used in all of the images in your database so far. A small search bar let’s you look up for some particular tag. This is handy when you have hundreds of tags.
Each tag comes with two buttons next to it. First, add tag to search bar and activate search. Second, set the current tag to search bar and activate the search.
The sorting order of the tags can be configured via Settings menu. There are two options for sorting. Rating and Alphabetical. The Rating sorting will place the tag higher up on the list depending on the frequency of the tag used on images, i.e. the more images have this tag, the higher the position. The Alphabetical order will order the tags alphabetically, as the name suggests.
Thumbnails Preview
The Right side of the main window marked by the number three displays small preview of images returned by the search.
Double clicking the thumbnail will open Image view window and tagging. Right click on the thumbnail will trigger a pop up with context menu (you should select the thumbnail first). Selecting the images and pressing the right mouse will trigger context menu with the following operations:
- Select All – will select all the images in this view
- View and Tagging – open the window to preview the image and assign tags to it
- Copy co Clipboard – copy the bitmap of the image into a clipboard, the image can be pasted into your image editing software
- Edit – open the editing window
- Assign Collection – set the collection for the selected images
- Remove – will remove the selected images
Once the application is started the thumbnail preview area will be empty. It is possible to configure that behavior with the Settings menu. There are five options to choose from. Empty, All, Tag and Without Tag.
Add/Remove Images
There are two ways to add images to the database. First, is to add it by navigating the directory by using menu Image – Add from Directory. Notice that this way of adding allows you to add only select files in the directory but not the directories itself. Second, is to paste the images from clipboard. This way is much better comparing to the first one given that you can select directories and files together, Delice will search directories recursively and add all supported images to the database. To add the images this way use the menu Image – Add from Clipboard.
At this point Delice supports the following image formats: png, jpg, jpeg. To add other formats, please convert the files first.
Once the image added to the app it will get a unique name and be placed in internal directory (Root Directory specified in the settings). Be aware that the app will not track any duplications while adding images. That means you can add the same images multiple times and they will be all added to the database.
Be advised that renaming, moving or removing files in the Root directory will cause the application work improperly.
To remove the image Right Click on the thumbnail. On the popup window select Remove action. This will trigger Yes/No popup. By clicking Yes, the image will be removed from the database.
Adding Tags to the Image and Editing Regions
The tagging system is the core functionality that enables full power of the application. The tags can be assigned to images as well as to particular regions on the image. We call this regions Regions of Interest (ROI for short). The assigned tags to images or regions then used for Search, Board view and Practice mode.
Image tagging window is accessed by right clicking on the image thumbnail and choosing View and Tagging option. Or simply by double clicking on the image.
The tagging window is separated into two regions.
The First region (labeled by number one) is the list of assigned tags. It is all about manipulating the tags for regions or the entire image. Area A contains operations related to regions. First button is a toggle to start adding the new region. Once clicked you can drag over the image to create new region. The second button is a toggle to hide or show all the regions. The third button is a command to remove all the regions from the image. The last button is for triggering automatic tagging for the image. If the button is green, it means that the Delice have already tried to annotate the image and the click will do nothing.
Area B is an input to add the tags to the region or an entire image. You can specify multiple tags by comma.
There are two types of regions assigned to the image, the entire image, and the region around the object. For each region, you can make it active by clicking a circle button (once the circle is filled, the region is active). The “chat” button will trigger a text editing window. The text assigned to the input will be displayed next to the image or region on the Board View.
Each ROI will then have a list of tags. To remove the tag, press the bin icon, next to tag name.
Area C is the region associated to entire image.
Area D is the list of regions around objects and their corresponding tags.
The second region (labeled by number 2) is ROI editor and image viewer. You can zoom and pan with the scroll wheel or double click to reset the zoom. Active regions will be slightly highlighted and have a small square next the them (area F). Inactive regions will be slightly dimmer that the active (area E)
The region can be removed by activating it by clicking Activate box or selecting within ROI editor area and calling context menu by right click button. The button Remove will remove the region. All the tags assigned to the region will also removed from the image.

It is also possible to add tags to the batch of images. If you select multiple images and chose Batch Tagging, you will be able to assign tags to all of the selected images.
Assigning Text Reference
Each region can also be assigned with the text reference. To add the text click the button that looks like a chat icon. An editor will popup. The assigned text can now be displayed on the Board view.
Modify the Image
For cases when only a part of the image is important or the image is rotated (common for pictures made by mobile phone) you can use image editor to do a basic editing.

There are two main operations you can do with image. First, rotate the image in any way. The buttons are pretty self explanatory. The second, is the crop.
To crop the image activate the crop tool (the button with the rectangle icon), after that you can drag it over the canvas, it will draw a rectangle. This rectangle is depicting the image that will left after you apply the crop. To apply the crop press Enter.
When the image is edited the title bar will have an asterisk next to the text. You need to press Save button in order to apply the changes.
Should you change your mind you can press Undo/Redo buttons (depicted as curved arrows).
Mood Board Window
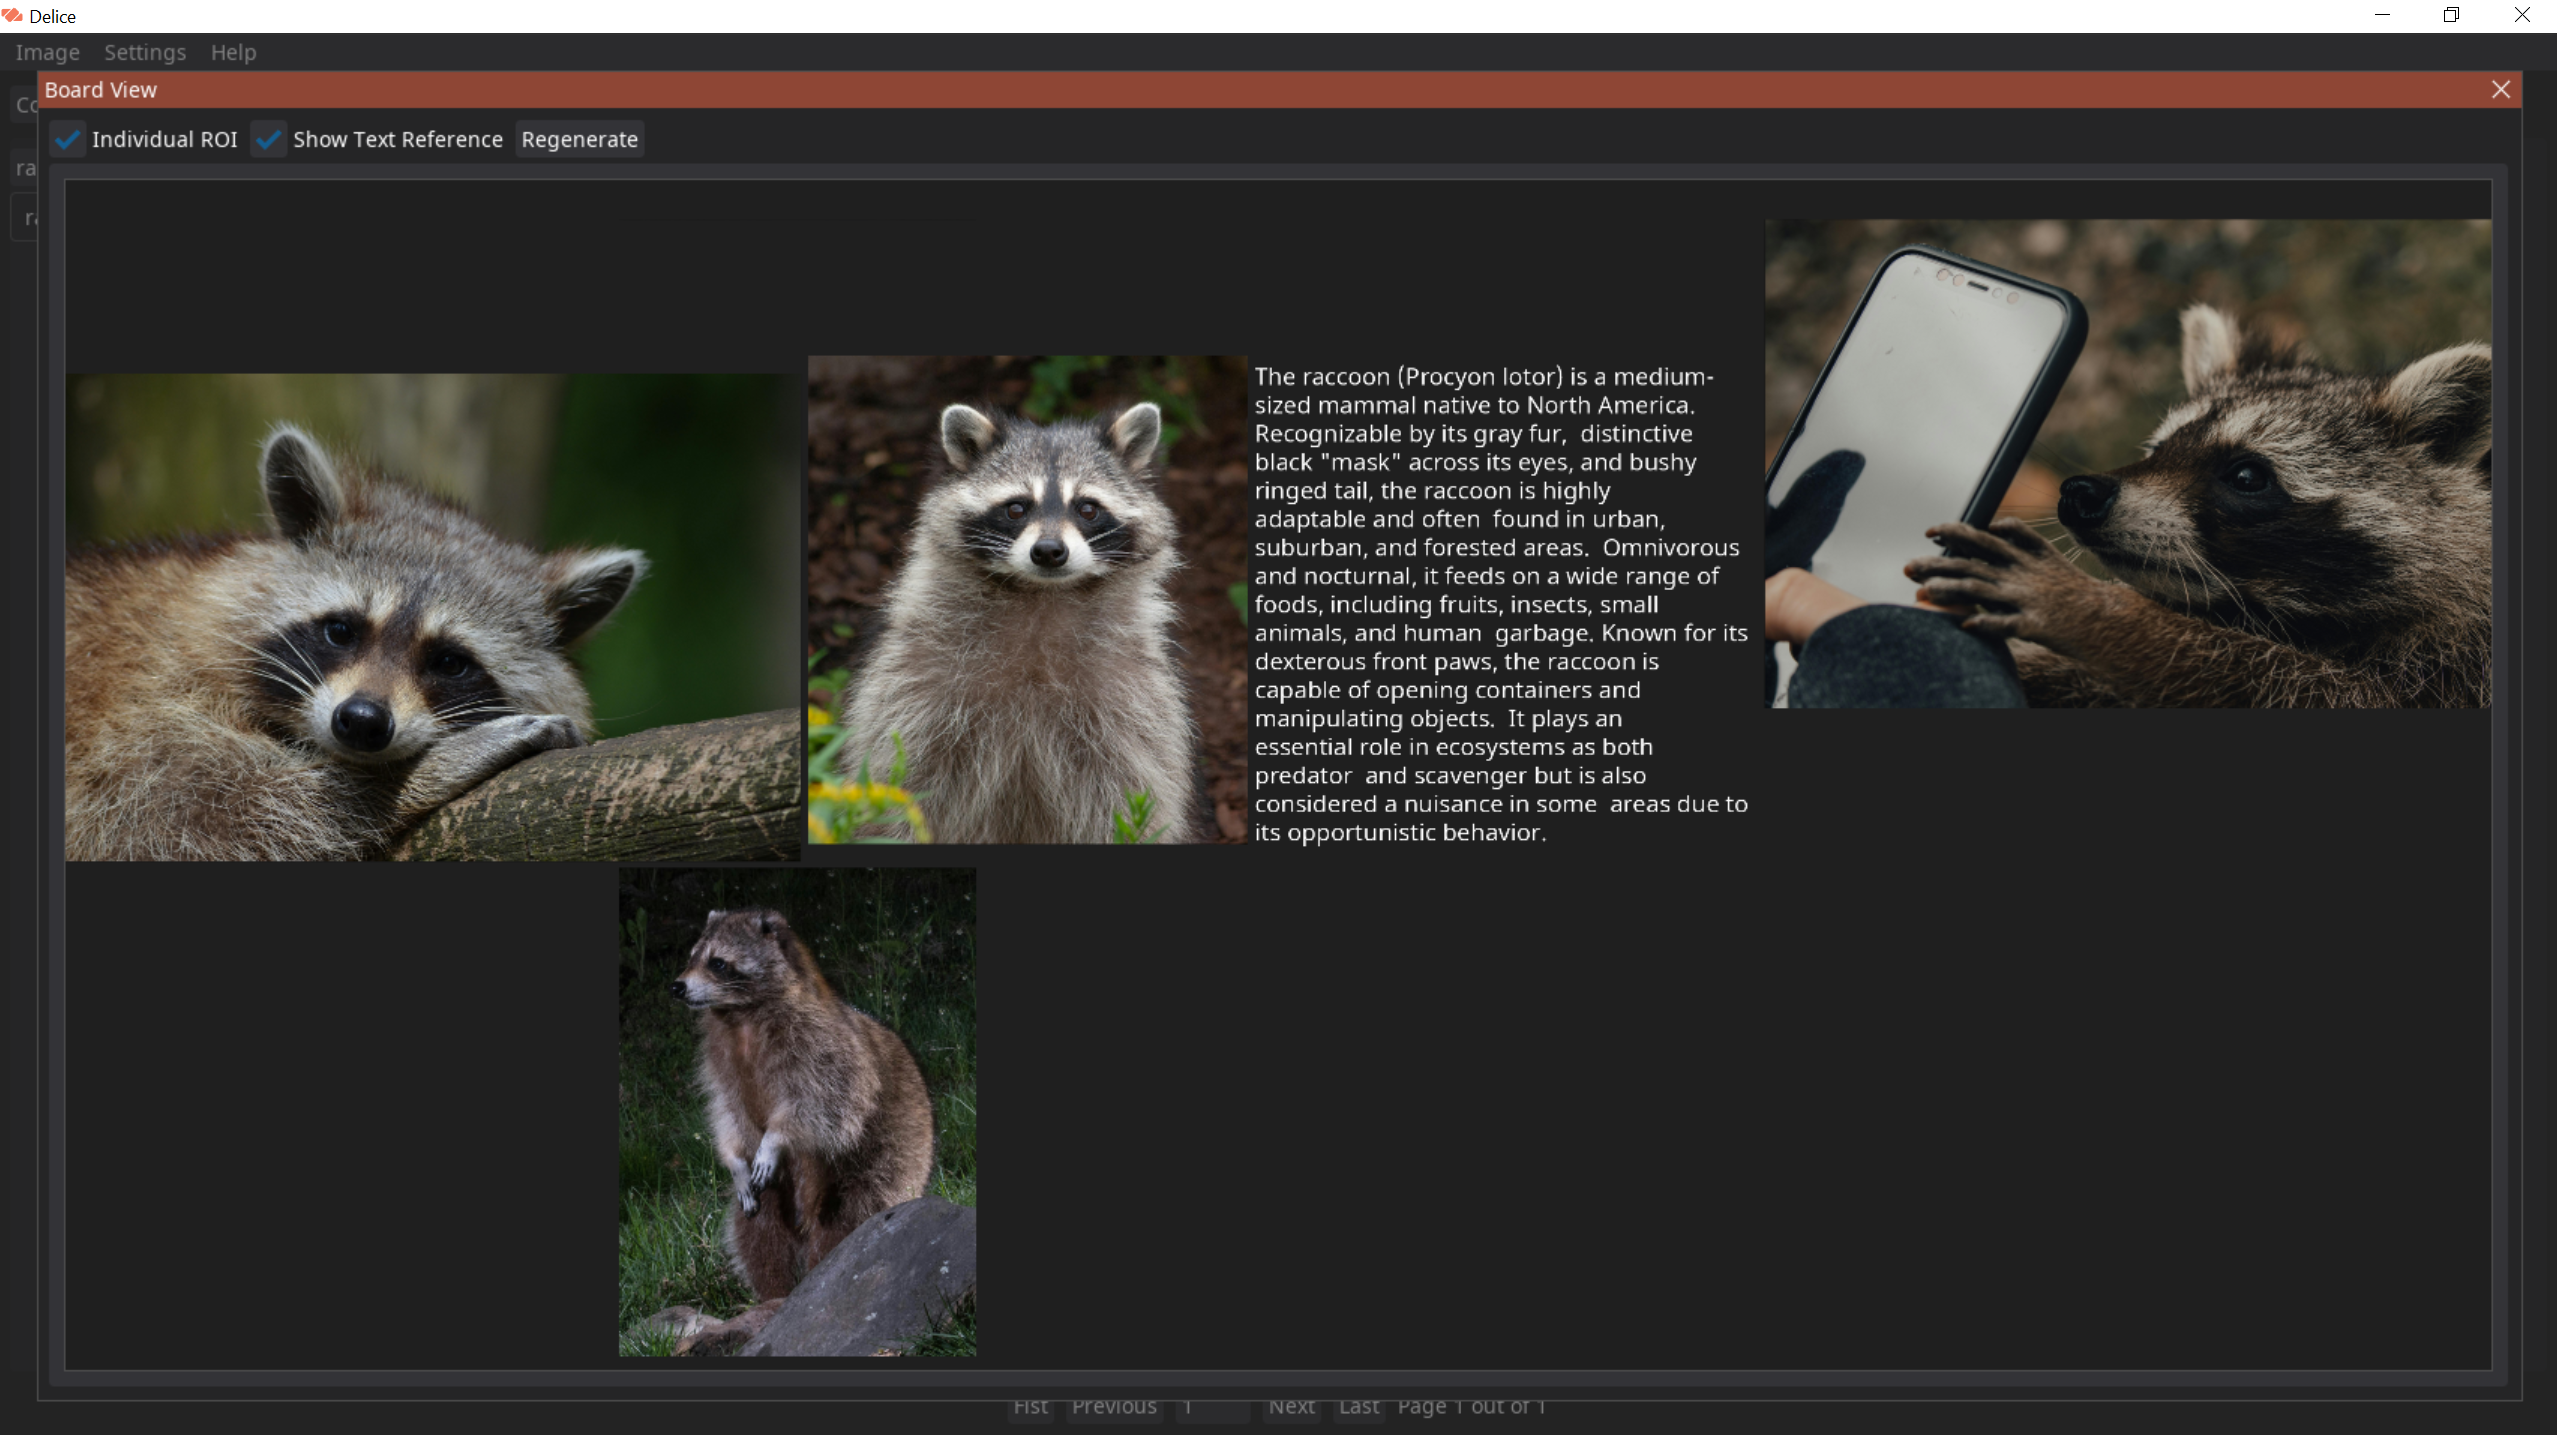
The purpose of the Mood Board view is to display the set of references in the single window. As the name suggest the board will be generated from the number of images in your database to inspire you while doing your project.
The board view can be regenerated by using Regenerate button. The checkbox Individual ROI controls whether to use ROI or not. In other words if the area of the face in the picture of human was selected and board with tag “face” is generated – only the area of the face will be placed on the board, instead of entire image.
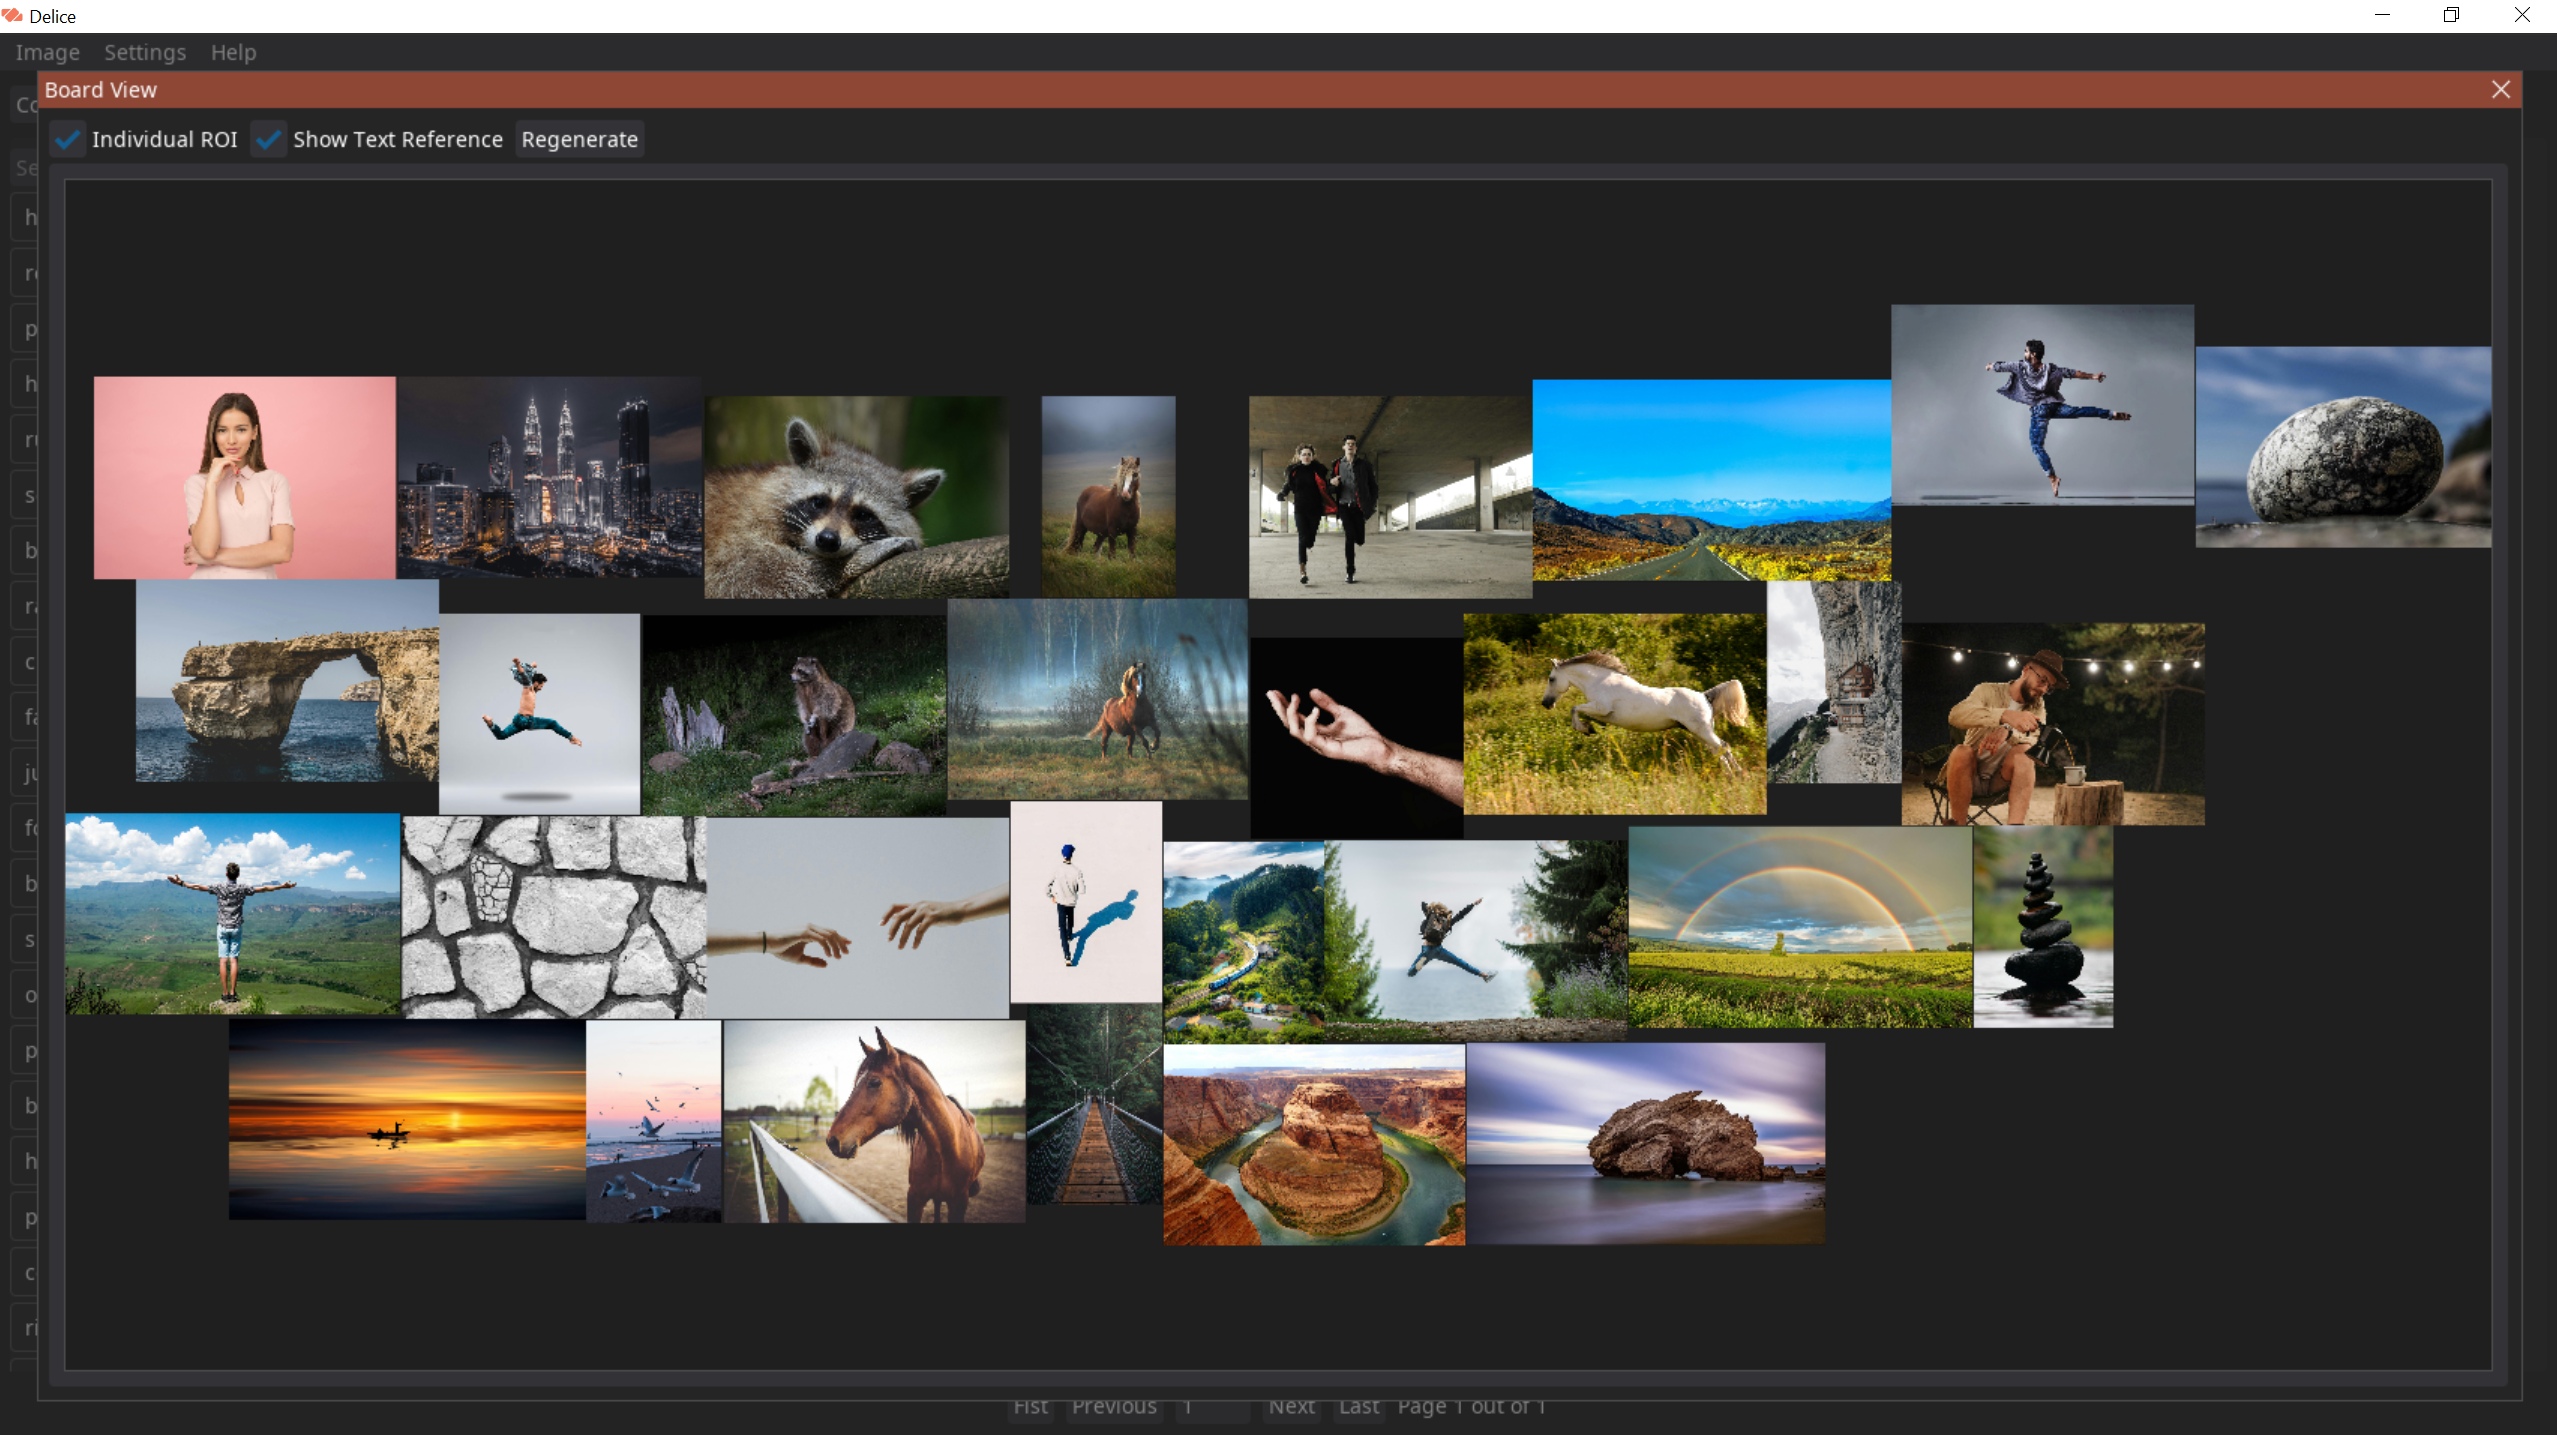
Delice also can display a text reference next to image. Whether to show it or not can be controlled by toggling the checkbox Show Text Reference.
The way board generation works. Delice will search for the images in the database by given condition. Then it will sample certain amount of images and generate the Board view by given strategy. The number of items put on the canvas is configured by Board Images Count within Configure window. Keep in mind that the higher the number the longer it will take to generate the board. For layouts of images, there is one strategy available: Natural.
This strategy can be configured in the Board View Layout section of Configure window. However, the only one option is available at this point.
The images on the board view are interactable. It means that you can select them and move them. You can also directly open image to view and tagging on a selected image.
Deliberate Practice
Deliberate Practice window is used for daily training. Enter the name of the tag you want to practice and click Practice button.
The Practice window has two areas. First area (labeled with number 1) is the settings for the practice. You can set the time for single image by setting the number of minutes (region C) and seconds (region D). Or, you can choose one of the preset (region B). Once you click Start button (area E) the counter (region A) will count down to zero. Once the counter reaches zero, the next image will be displayed within the area on the right (labeled by number 2). If you want to skip the image just click the Next Image button (region F). Notice that you can use this button to cycle through images without starting the timer. Click Stop button (the region E, active only if you started practicing) to stop practicing.
Keep in mind that the maximum time you can set for single image is 1 hour.

Configuration
The configuration window can be invoked by using menu command Settings – Configure.
There are multiple aspect of the application that can be configured.
Database Root. The main place where all the files will be stored.
Board Images Count. The number of images sampled to be displayed on the board view.
All Tags Sorting. The strategy on how the list of all available tags will be displayed on the main window.
Starting Page. Controls what kind of thumbnails will be displayed on the main window.
Board View Layout. The way the images will be aligned on Board View.
Troubleshoot
Delice also comes with the small helper window that helps monitoring what is going on in the application. You can see the history of most of the actions by opening the window Help – Troubleshoot. If something weird going to with the application, please consult to this window. Most of incorrect things will be marked by ERROR prefix.
Should you encounter any errors that should not have happened, please reach us out so that we can fix it.
You can also validate the database for broken records by using menu Help – Database. This is helpful if some error happened when adding images or some of the images were broken on your file system.